Identity Provider Metadata XML Required to enable SSO for Okta
Before enabling SSO for Okta be sure to have access to the Provider Metadata XML provided within your Okta Account.
How to find "Tiled" in Okta OIN
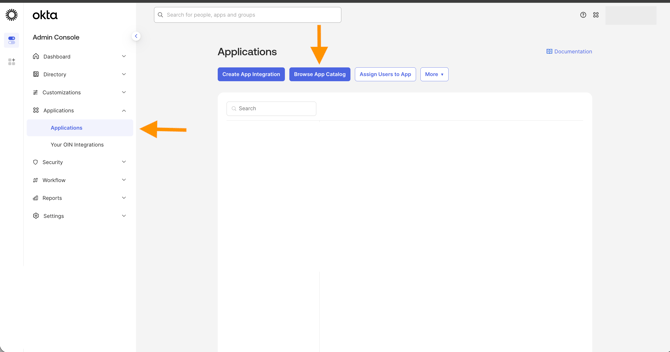

Configuring Okta for Tiled is split into two parts. The first part details how to configure the settings in Tiled and the second part covers how to configure the settings in your Okta Account.
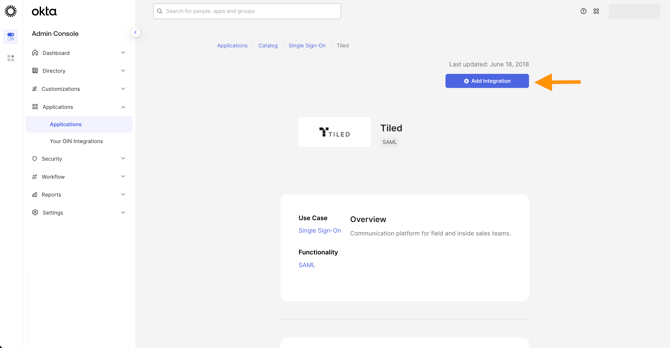
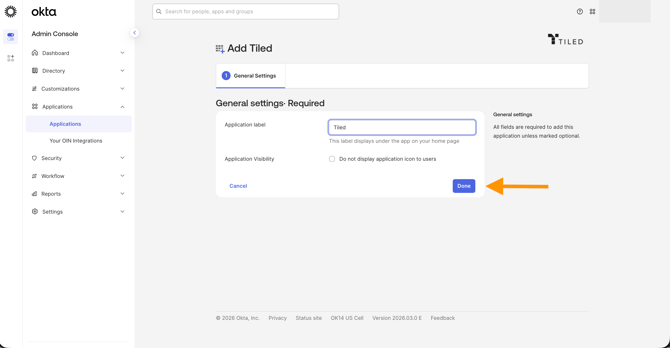
This setup might fail without parameter values that are customized for your organization. Please use the Okta Administrator Dashboard to add an application and view the values that are specific for your organization.
Part 1: Tiled Settings
Identity Provider Metadata XML Required to enable SSO for Okta.
Before enabling SSO for Okta be sure to have access to the Provider Metadata XML provided within your Okta Account.
0. In Okta, select the Sign On tab for the Tiled app. Scroll down to Metadata details and copy the Metatdata URL link.

- Login to Tiled as an account administrator and navigate to Account Settings.
-
Under General Settings, scroll down to Configure single-sign on (SSO).
-
Select Enable SSO or Force SSO. If you choose “Force SSO” users will not be able to login via password.
-
Select Okta.
-
Add the Org Domain or Entity ID.
-
Add the Identity Provider Metadata XML. Copy and paste the code generated from the url from Step 0.
-
Download the safety certification.
-
Click Update Okta SSO Settings.

-
Next, find the Auto Provisioning section, just below the SSO settings.
-
Check the Enable Auto Provisioning box. Select a required Default Role, Default Library and Default Group for new users. (If you have not configured any groups for the chosen "Default Library", this "Default Group" option will not be selectable.) Your selections will be auto-saved as you update the options.

Part 2: Okta Settings
-
In Okta, select the Sign On tab for the Tiled app, then click Edit.
-
Encryption Certificate: Upload the certificate you downloaded in Part 1, Step 7.

- Scroll down to the ADVANCED SIGN-ON SETTINGS section. Enter the Org Domain value you made a note of in Part 1, Step 5 into the corresponding field. Click Save.

- Still in Okta, navigate to Security > API > Trusted Origins. Click Add Origin.

- Fill out the Origin information as seen in screenshot and click Save.

Additional Info
The following SAML attributes are supported:
-
user.firstName
-
user.lastName
-
user.userName
|
Name |
Value |
|---|---|
|
name |
user.firstName user.lastName |
|
|
user.userName |
The Okta/Tiled SAML integration currently supports the following features:
-
SP-initiated SSO
-
IdP-initiated SSO
-
JIT (Just In Time) Provisioning.
For more information on the listed features, visit the Okta Glossary.
SP-initiated SSO
-
Click “SSO"

-
Enter “Org Domain” value (from Part 2 Step 3) and click “Next”

-
Enter your Okta credentials and click “Sign In”

Was this article helpful?
Yes No