The Tiled Asset Library is the shared storage space for creative content to be organized and used within your microapps. Not to be confused with the Asset panel in the Tiled Builder, the Asset Library is a separate page within your Tiled account that allows you to organize your shared creative assets in folders.
The Asset Library contains two primary entities;
- Libraries
A folder to group similar or related images and video assets together. - Assets
Image or video files that can be used within your microapps.
Asset Libraries are especially helpful when you have many creative assets and multiple projects underway. Libraries, and consequently Assets within those libraries can be used in the Tiled Builder from the assets panel.
There are two types of Asset Libraries:
- Tiled Libraries
Assets are uploaded from a users local machine and stored directly in Tiled. - Adobe Libraries
Assets are uploaded and stored directly to your Adobe Creative Cloud Account. Please note, in order to use this feature you must link your Adobe Creative Cloud account.
Creative Assets outside of Libraries
You do not have to upload media to the Asset Library in order to use it within a microapp. Creative assets can be uploaded in the builder or synced with a plugin.
Create a New Tiled Asset Library
A Tiled Asset Library is a collection of images and videos uploaded from a user’s computer to a Folder and hosted by Tiled for use within microapps.
1. Click Assets in the header of the Tiled Library.
2. Select + New Library from the left side panel. You will see an option to create a new Tiled Library or Adobe asset library.
3. Select Tiled Library.
4. Give your library a name that will be easily recognized by you and your team. Click Create. You will see your library created on the left side panel organized in alphabetical order.
Private Asset Libraries
Tiled does not yet support private Asset Libraries. All Tiled Asset Libraries will be visible to Editors, Admins and Account Admins inside the Tiled library it is created.
Create a subfolder for your new Library
1. Select an existing Library from the left hand panel.
2. Click the Create folder button in the top right
3. Name your subfolder and click Create. You will see your subfolder created under your library in alphabetical order.
Note To move a subfolder to a different library, simply drag and drop it on top of your desired library.
Uploading Assets to a Tiled Library
1. Click the blue Upload button. A window appear allowing you to select assets to upload from your local machine to the Tiled Assets Library.
2. Select your assets and click Open.
If you are uploading assets from the All Assets view, you will see the following:
-
The selected assets appear under the Assets section of the page
-
The selected assets appear in a Tiled asset library named Uncategorized
If you are uploading assets from a Tiled Asset library view, you will see your assets appear in the library.
Default Category
A new Tiled asset library named Uncategorized gets automatically created by the system when adding assets from the All Assets view.
Replace an Asset in a Tiled Library
To replace an asset in a Tiled Library, identify the location of the asset and simply upload an image or video with the same file name as the asset you wish to replace. When you replace an image or video in an Asset Library, it will be updated in all of locations that asset is used in your microapps. Remember the microapp(s) must be republished from the Tiled Builder to see the updated assets reflected in all public facing microapp links.
Example
Let's say you build a microapp that uses a photo named background-01.png from an Asset Library called Sales Deck Assets. If you replace the image background-01.png in your Sales Deck Assets library with a new image (but the same name), the new image will show in all of the microapp locations it is being used. This is a really great way to make an update to an image but see the change propagate across multiple microapps if it is an asset that gets reused or changes often.
Adobe Creative Cloud Libraries are a great way to manage creative assets
- Go to the asset library page by clicking the asset library icon in the top right hand corner.
- Select + New Library. There will be an option to create a new Tiled asset library or Adobe asset library.
- Select Adobe Library.
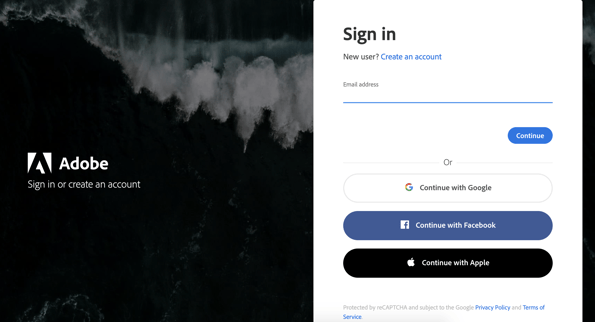
- Login to your Adobe CC account.
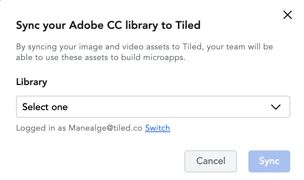
- After a successful login, you will be redirected back to the asset library and see a pop up modal to select the Adobe CC library you want to sync to Tiled.
- Select the Adobe CC library you want to sync from the dropdown and click Sync. You will see the selected Adobe CC library created and appear on the left side panel as well as the assets (if any) appear in the library.
Missing Adobe CC Assets?
Select Adobe CC asset library that is missing images. Click the blue Update button in the top right. Any new assets added to the Adobe CC Library will be synced over to Tiled.
Delete a Library
⚠️ IMPORTANT NOTE
When deleting a library, the folders' assets will not be available to use in future microapps, however the assets will remain in existing microapps.
To Delete a microapp:
1. Go to the Assets page.
2. Identify the Library intended for deletion.
3. Click the three dots next to the name of the Library.
4. Select Delete.